다음글) 2. jdk 설치 및 환경설정 detail-from-a-to-z.tistory.com/9
다음글) 3. Tomcat 9 설치 및 환경 설정 detail-from-a-to-z.tistory.com/10
다음글) 4. 이클립스 + 톰캣9 연동 detail-from-a-to-z.tistory.com/11
1. 이클립스 설치
Eclipse Downloads | The Eclipse Foundation
The Eclipse Foundation - home to a global community, the Eclipse IDE, Jakarta EE and over 375 open source projects, including runtimes, tools and frameworks.
www.eclipse.org
1) 위 링크를 클릭하거나 구글에 이클립스를 검색하여 이클립스 사이트에 들어간다.
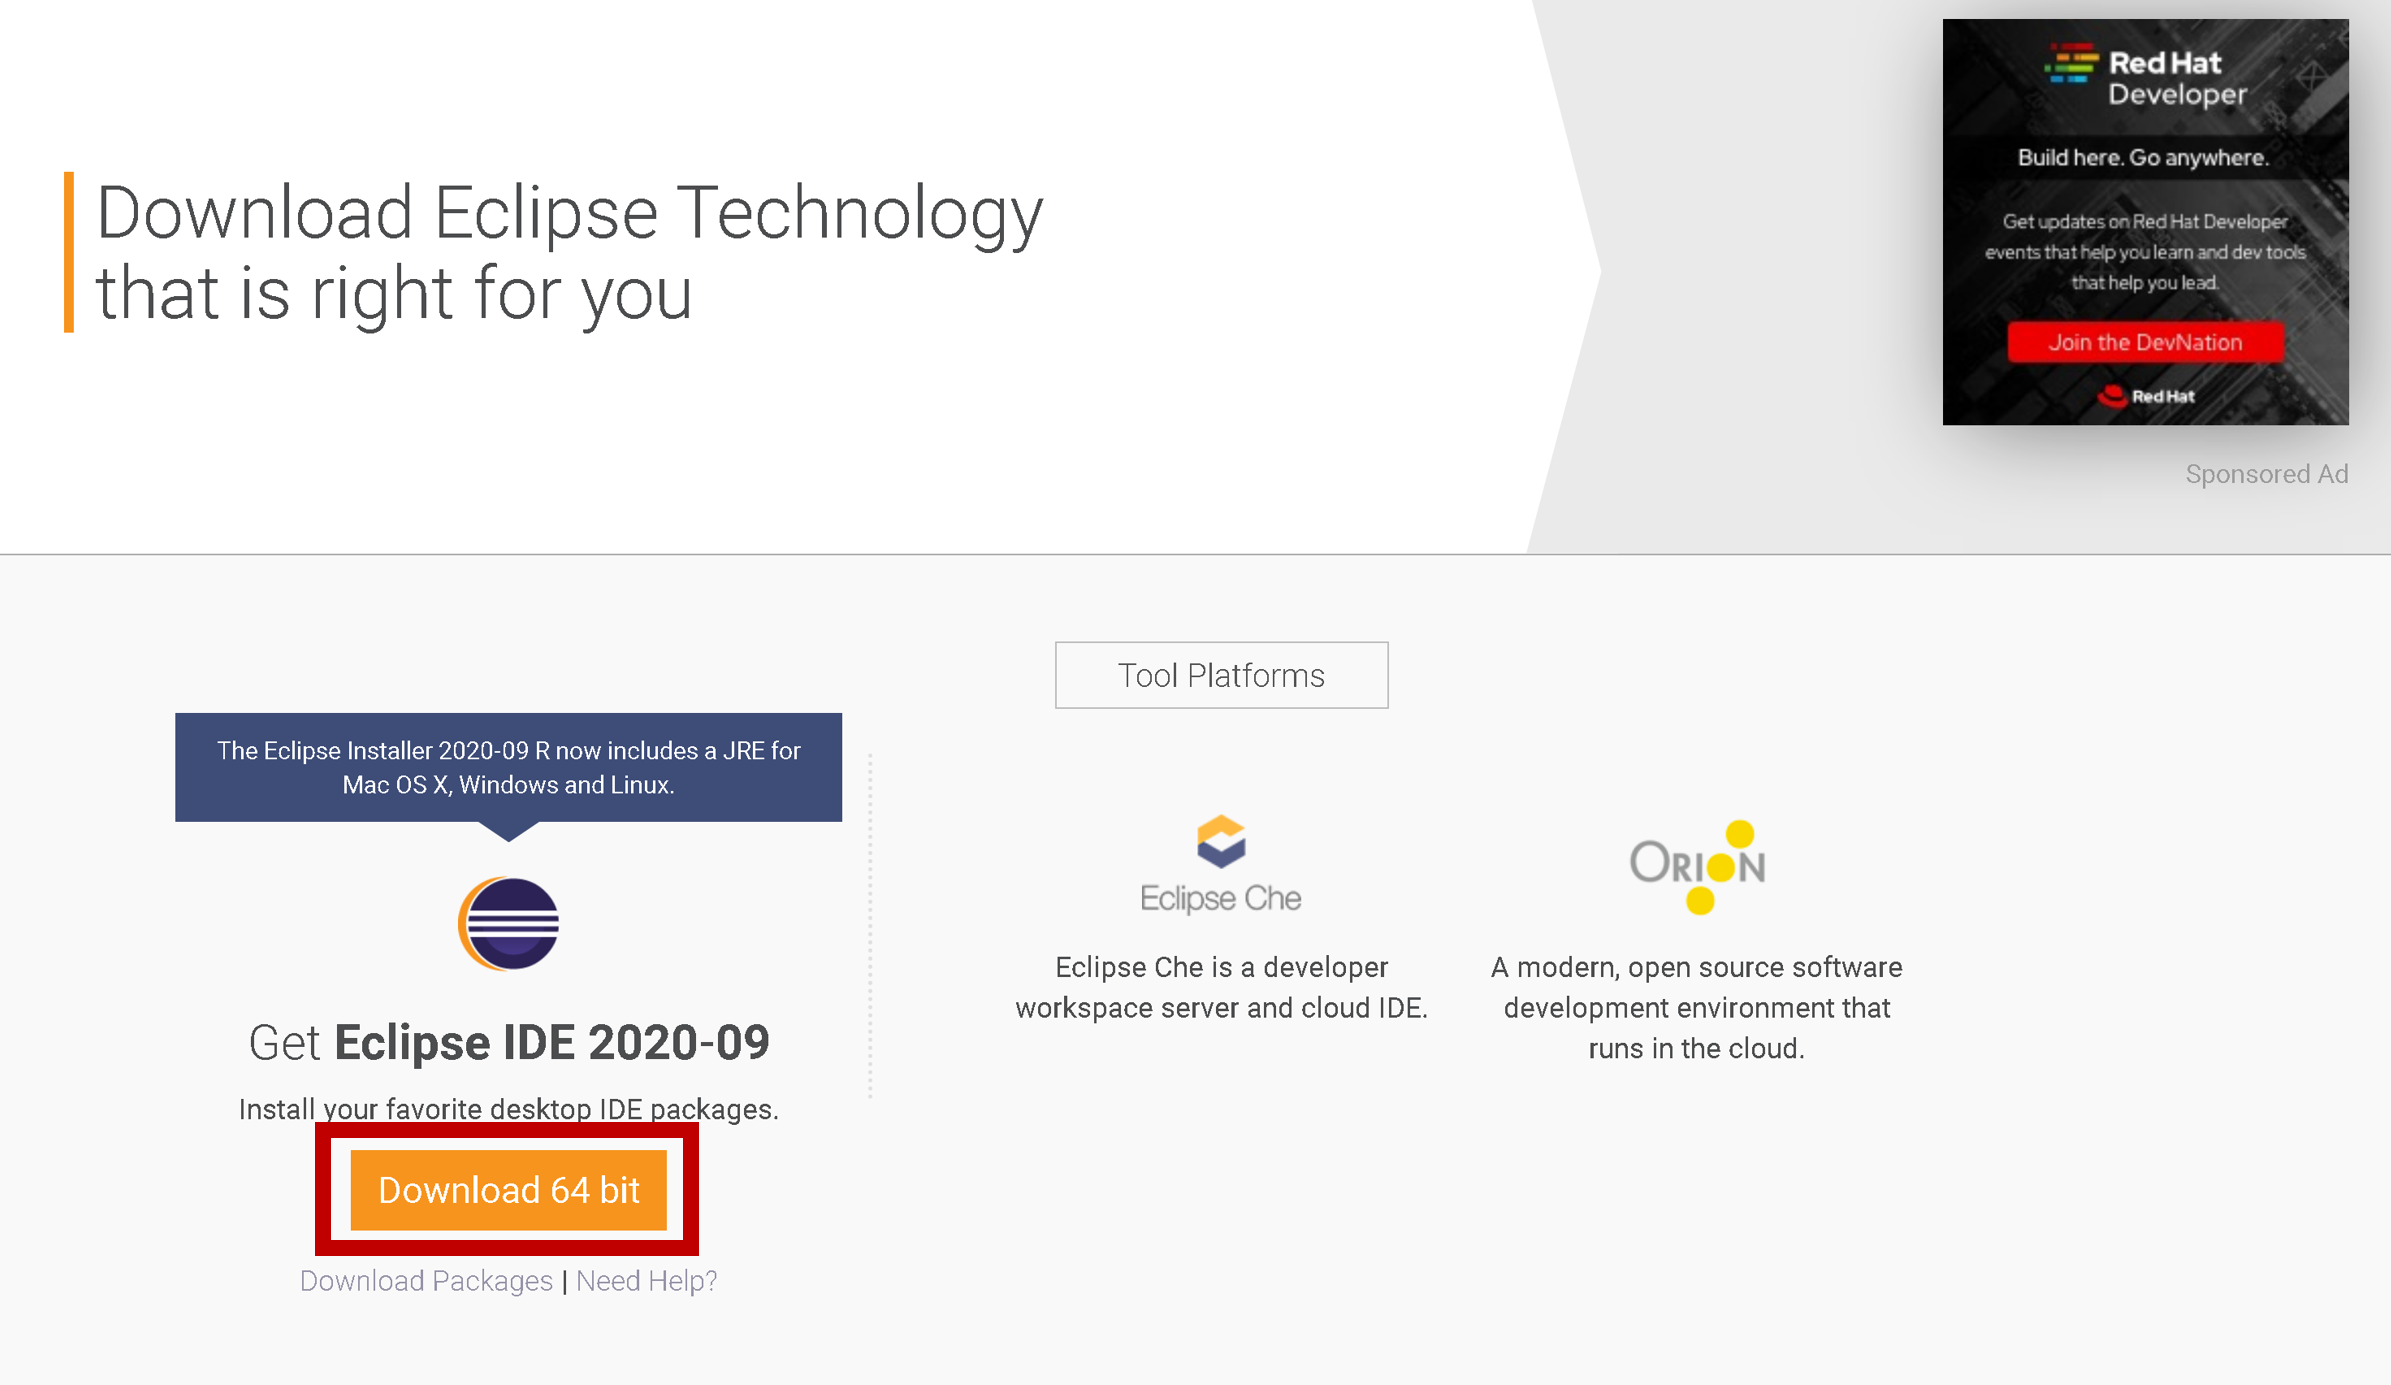
2) 첫 화면의 Download 64 bit를 클릭한다.

3) 바로 Download를 누르거나 >>Select Another Mirror로 해당 국가를 눌러 eclipse.exe 파일을 다운로드를 한다.
4) 다운로드한 설치파일을 실행한다.

5) Eclipse IDE for Enterprise Java Developers를 선택한다.
(이전 버전에서의 이름은 Eclipse IDE for Java EE Developers이다.)
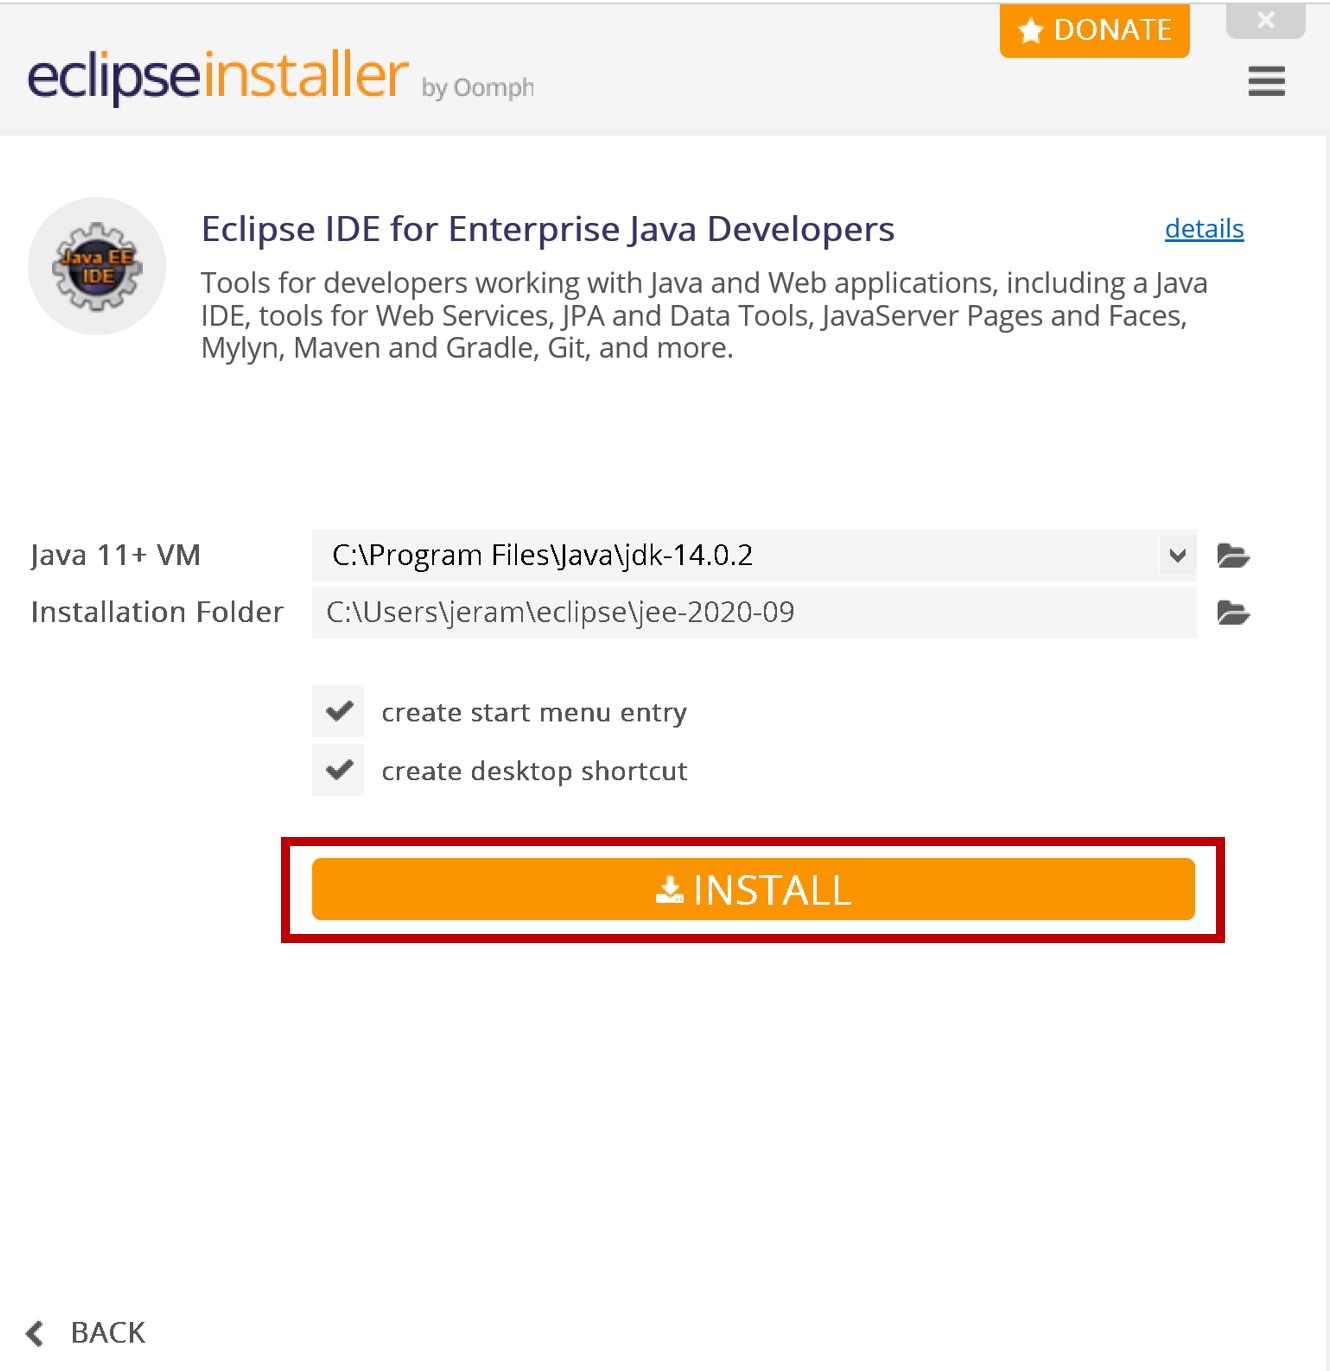
6) INSTALL 을 눌러준다.
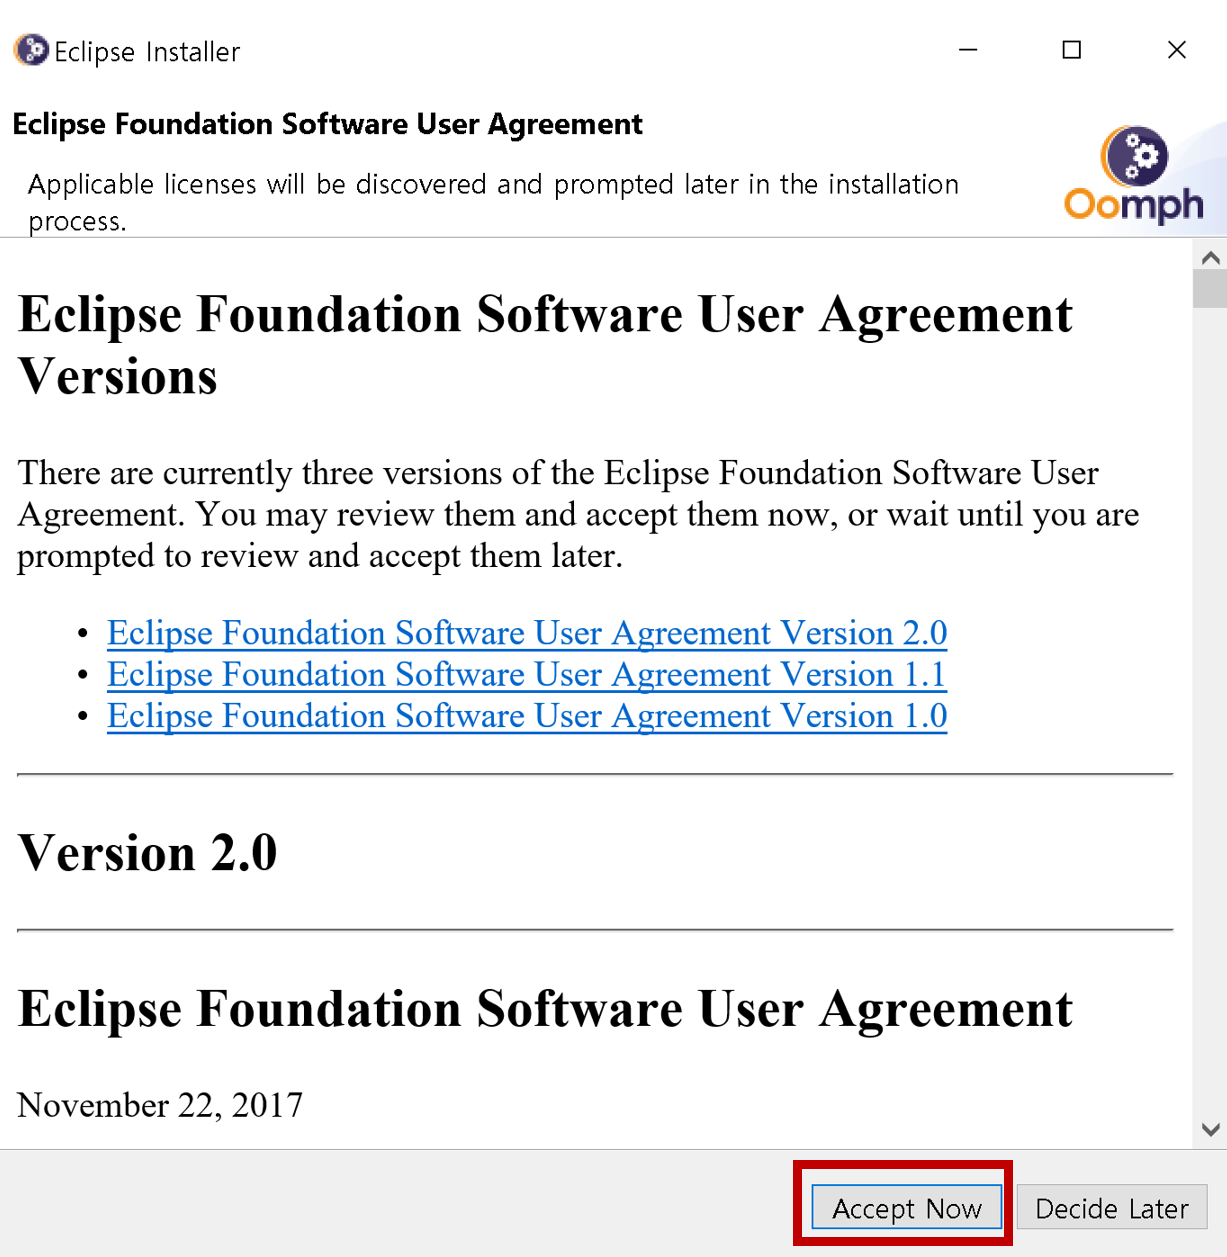
7) 라이센스에 관한 창이다. Accept Now를 눌러준다.
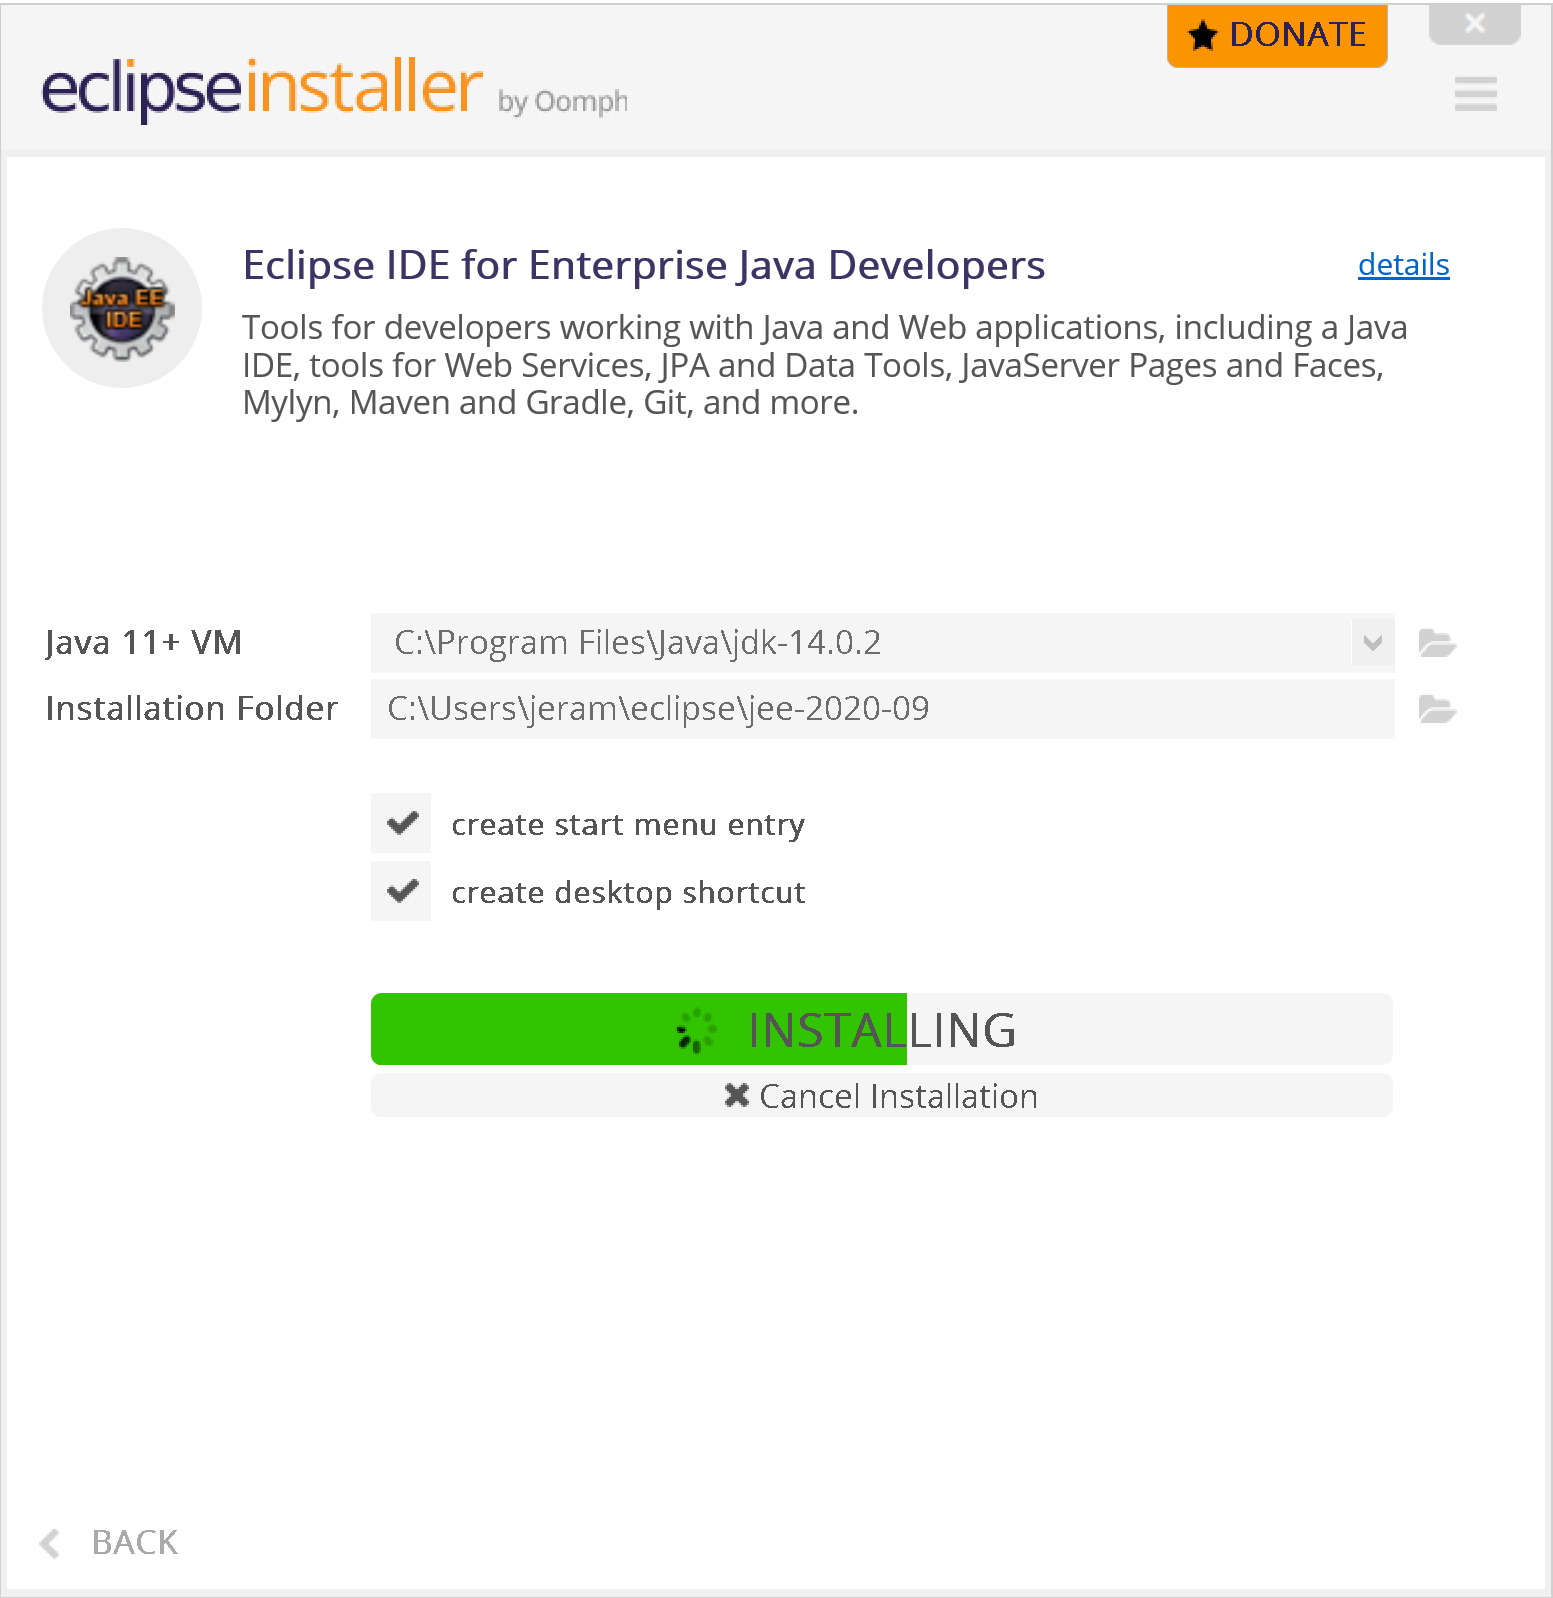
8) 잘 설치가 되다가

9) 이클립스의 인증서를 신뢰하는 지에 대한 창이 뜬다.
위에 두개를 체크해주고 Accept selected를 눌러준다. Always accept certificates는 원한다면 체크한다.

10) 설치가 끝났다. LAUNCH를 넣어 실행한다.
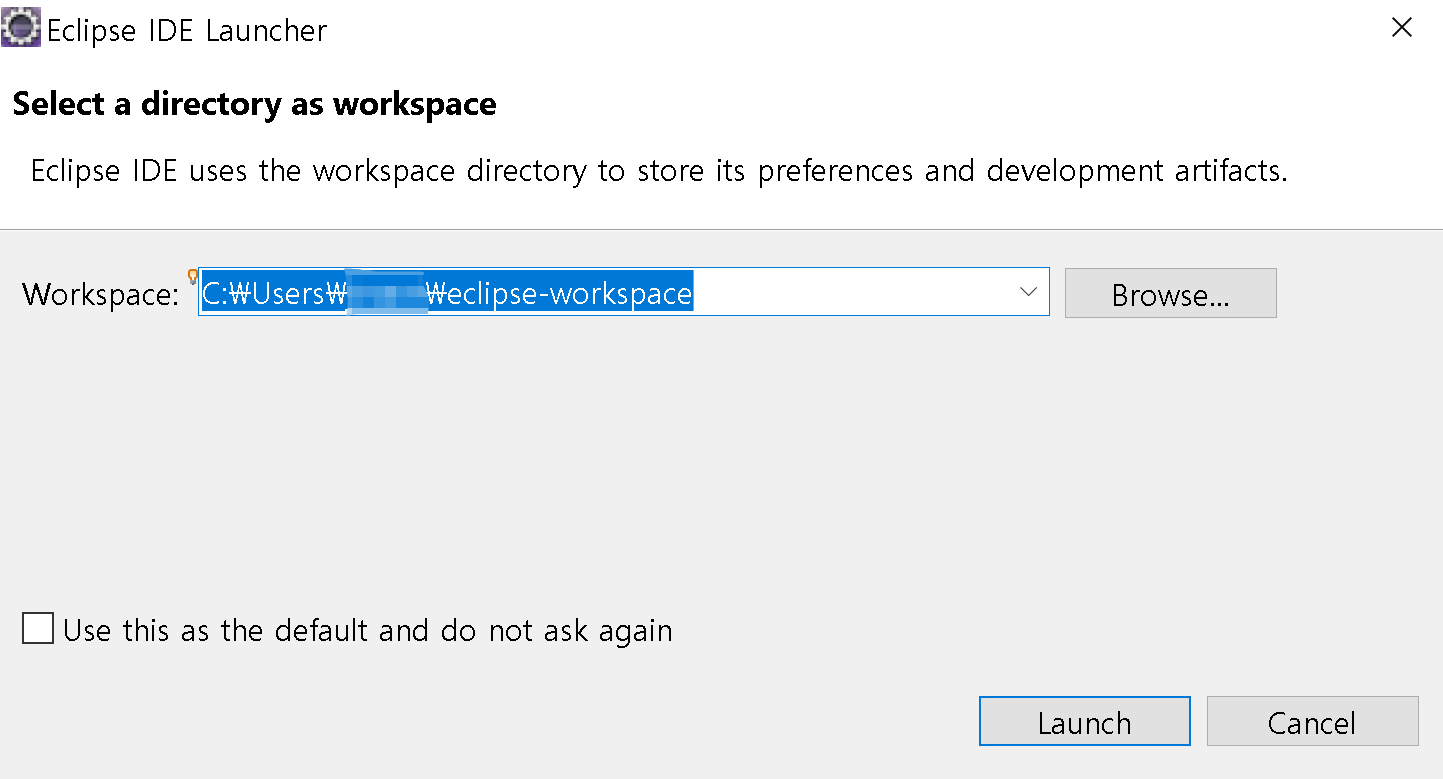
11) 실행하면 workspace를 지정하라는 창이뜨는데 기본으로 두는 것이 제일 좋다.
왼쪽 하단의Use this as the default and do not ask again를 체크하면 다음 번 eclipse 실행부터는 workspace를 지정하는 이 창이 뜨지 않는다.

12) 설치가 완전히 끝나 eclipse가 실행되었다.
이 Welcome 창은 맨 처음 실행 시에만 뜨며 다음 실행 시에도 또 뜨게 하고 싶다면 오른쪽 하단의 Always show Welcome at start up을 체크해준다.
다음글) 2. jdk 설치 및 환경설정 detail-from-a-to-z.tistory.com/9
다음글) 3. Tomcat 9 설치 및 환경 설정 detail-from-a-to-z.tistory.com/10
다음글) 4. 이클립스 + 톰캣9 연동 detail-from-a-to-z.tistory.com/11
'웹페이지 만들기' 카테고리의 다른 글
| 4. 이클립스(eclipse) 2020 + 톰캣(Tomcat 9) 연동 (0) | 2020.10.07 |
|---|---|
| 3. 이클립스(eclipse) 2020 + jdk + 톰캣(Tomcat 9) 설치 (0) | 2020.10.07 |
| 2. 이클립스(eclipse) 2020 + jdk + 톰캣(Tomcat 9) 설치 (0) | 2020.10.06 |


